
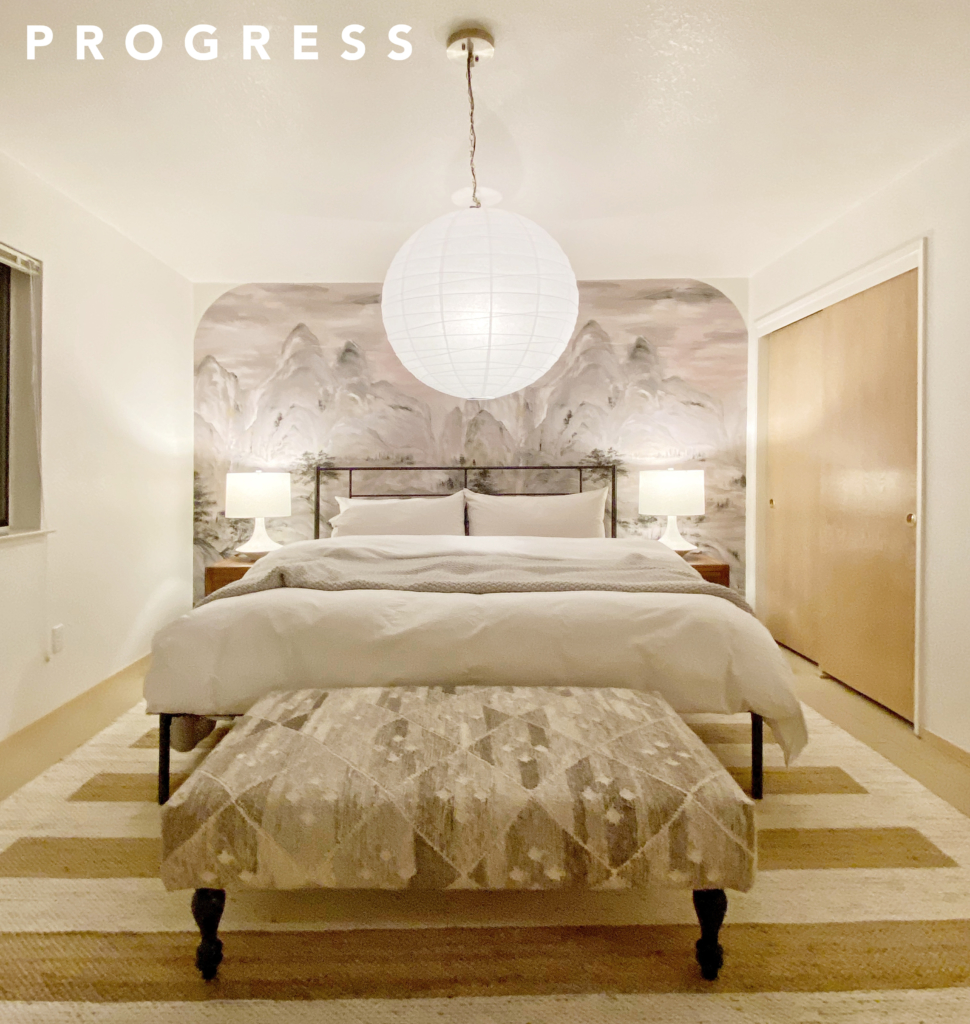
Hark! At short last! The guest bedroom I designed for my parents at Londo Lodge is done! You can read more about the ins and outs of what I did and why over on Emily’s blog, but here I’m gonna concentrate on how I mixed high and low to quickly transform this space. My goal for this first round of rapid makeovers is A) Not to spend too much money – I’m still financially recuperating for having to put a ton of money down to get the house in the first place, B) To renovate in a way that makes it easier to move forward with the next round of renovations (ie getting rid of carpet to make way for the gorgeous wide plank farm-style wood flooring I want to put in), and C) To use furnishings that will either make it into the final look of the home or that can easily be donated to people who need them.
Now, the concept of “splurge vs save” is kind of hard to talk about in a general sense because what might seem like a bargain to one person might seem like an absurd about of money to someone else. So for the purpose of this blog post, I’m mainly talking about things within the context of this room, not the wide world of interior design. The most expensive thing in this room is actually the rug, which, at about $1200 is actually not expensive for a rug at all (though I realize that might sound like a lot of money, you’d be hard pressed to find a 10×14 rug of this quality for much less than that). Rugs are one of the things whose price shocks clients most frequently, as a fancy, high-quality rug can cost upwards of $40,000. The purpose of these makeovers is to be approachable so I’ve tried not to source items that were too far out of the realm of typical home furnishings, but I realize that the concept of a price being “typical” is probably in and of itself a little problematic. So if you’re reading this thinking, “oh, that still sound expensive” just know the main way I saved money doing this room was doing everything myself and that you could probably achieve a similar look for even less money than I did by looking for less expensive alternatives to the furnishings I chose. Anyway, onto my saves and splurges…
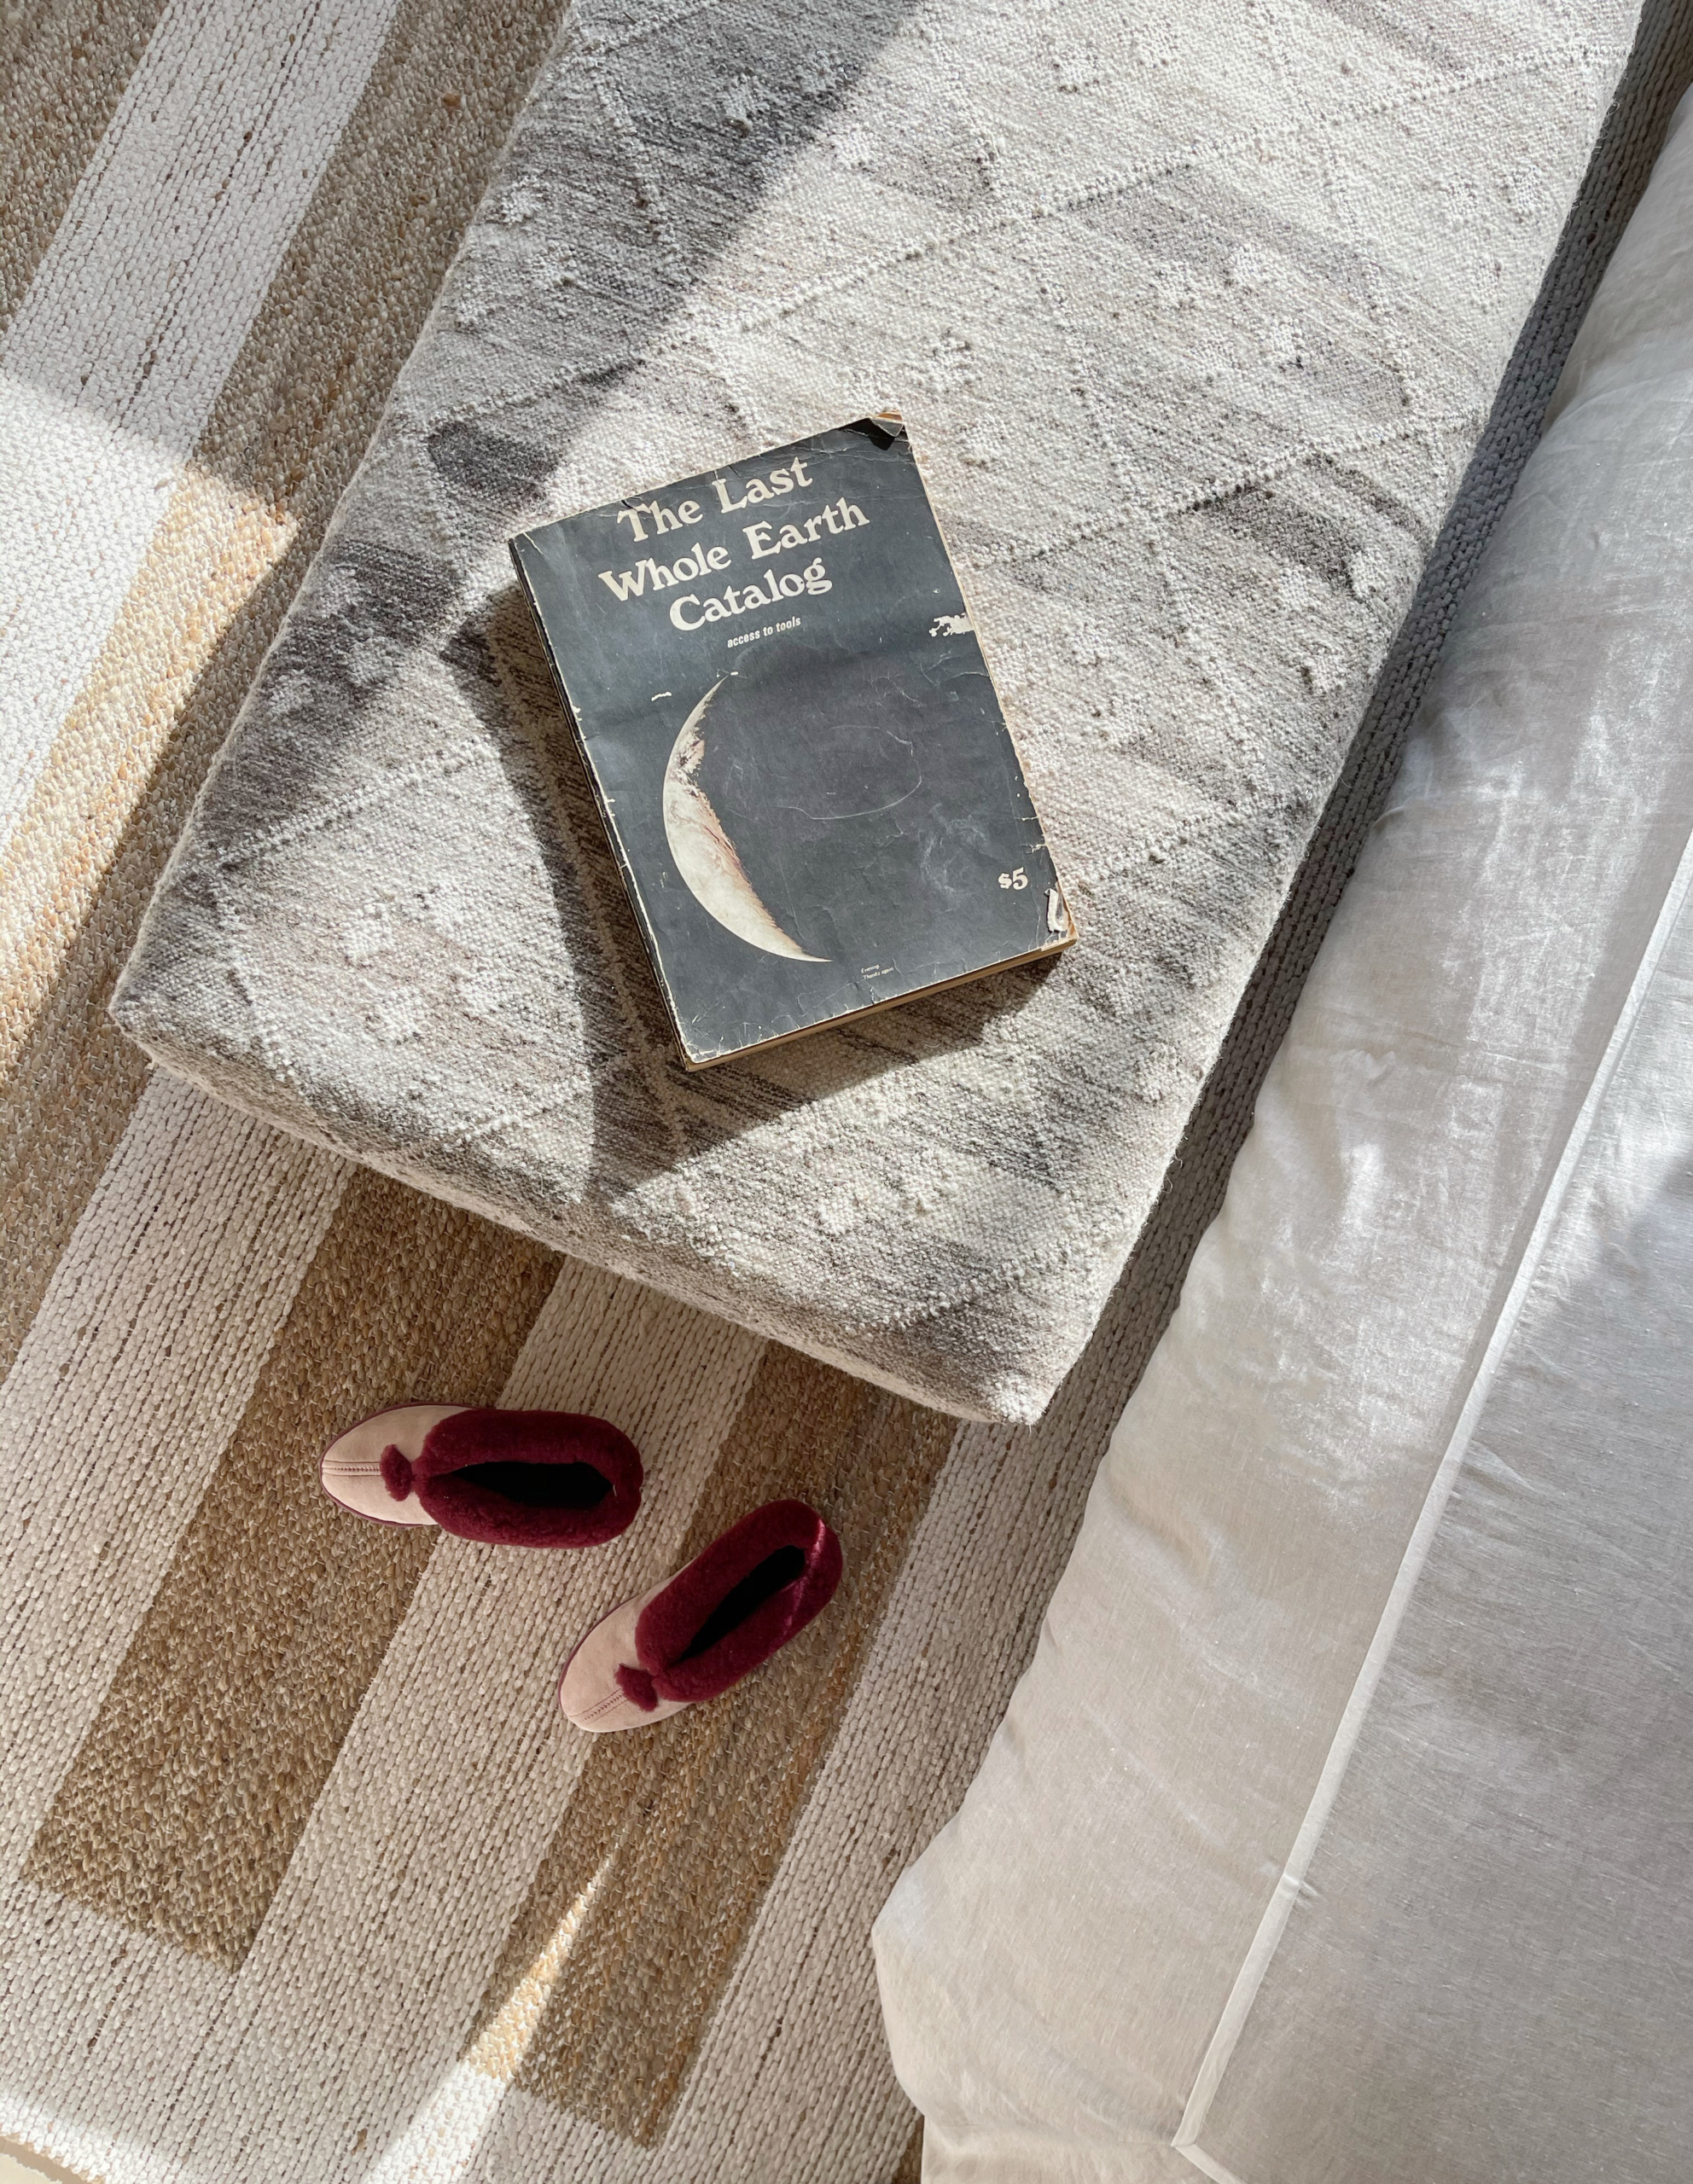
SPLURGE (KIND OF): THE RUG
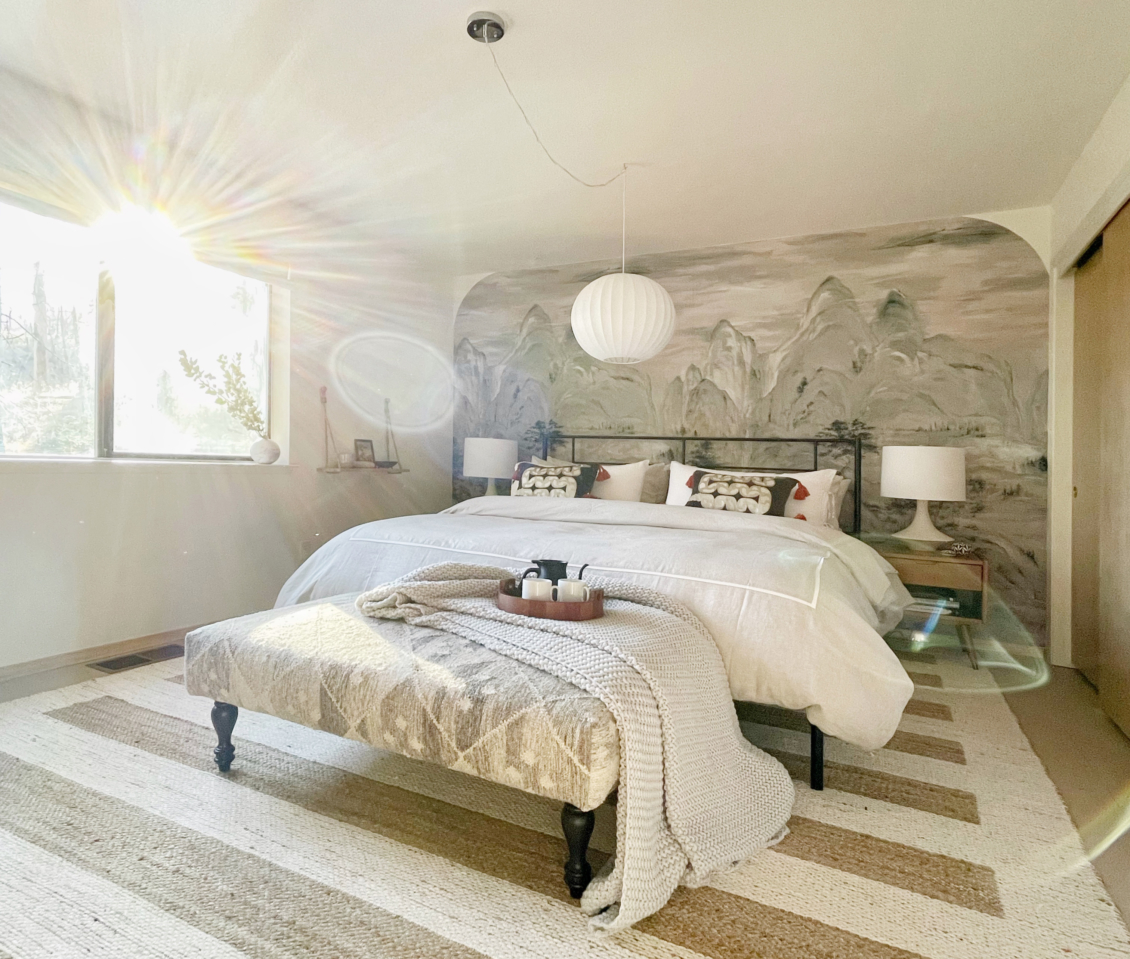
Because I ripped up the carpet in here I knew I needed a huge rug that would basically cover the entire floor. As I said above, a $1200 rug this size is actually a steal, it was one of the bigger items on my “budget” for the room (“budget” is in quotes because Annie Selke kindly sent the rug to me for free, but I was trying to keep the overall value of everything in the room realistic). If you were trying to recreate this look for less, you could try buying multiple smaller jute rugs and pairing them (you could even hand-paint the white stripes on it if you wanted that preppy look).
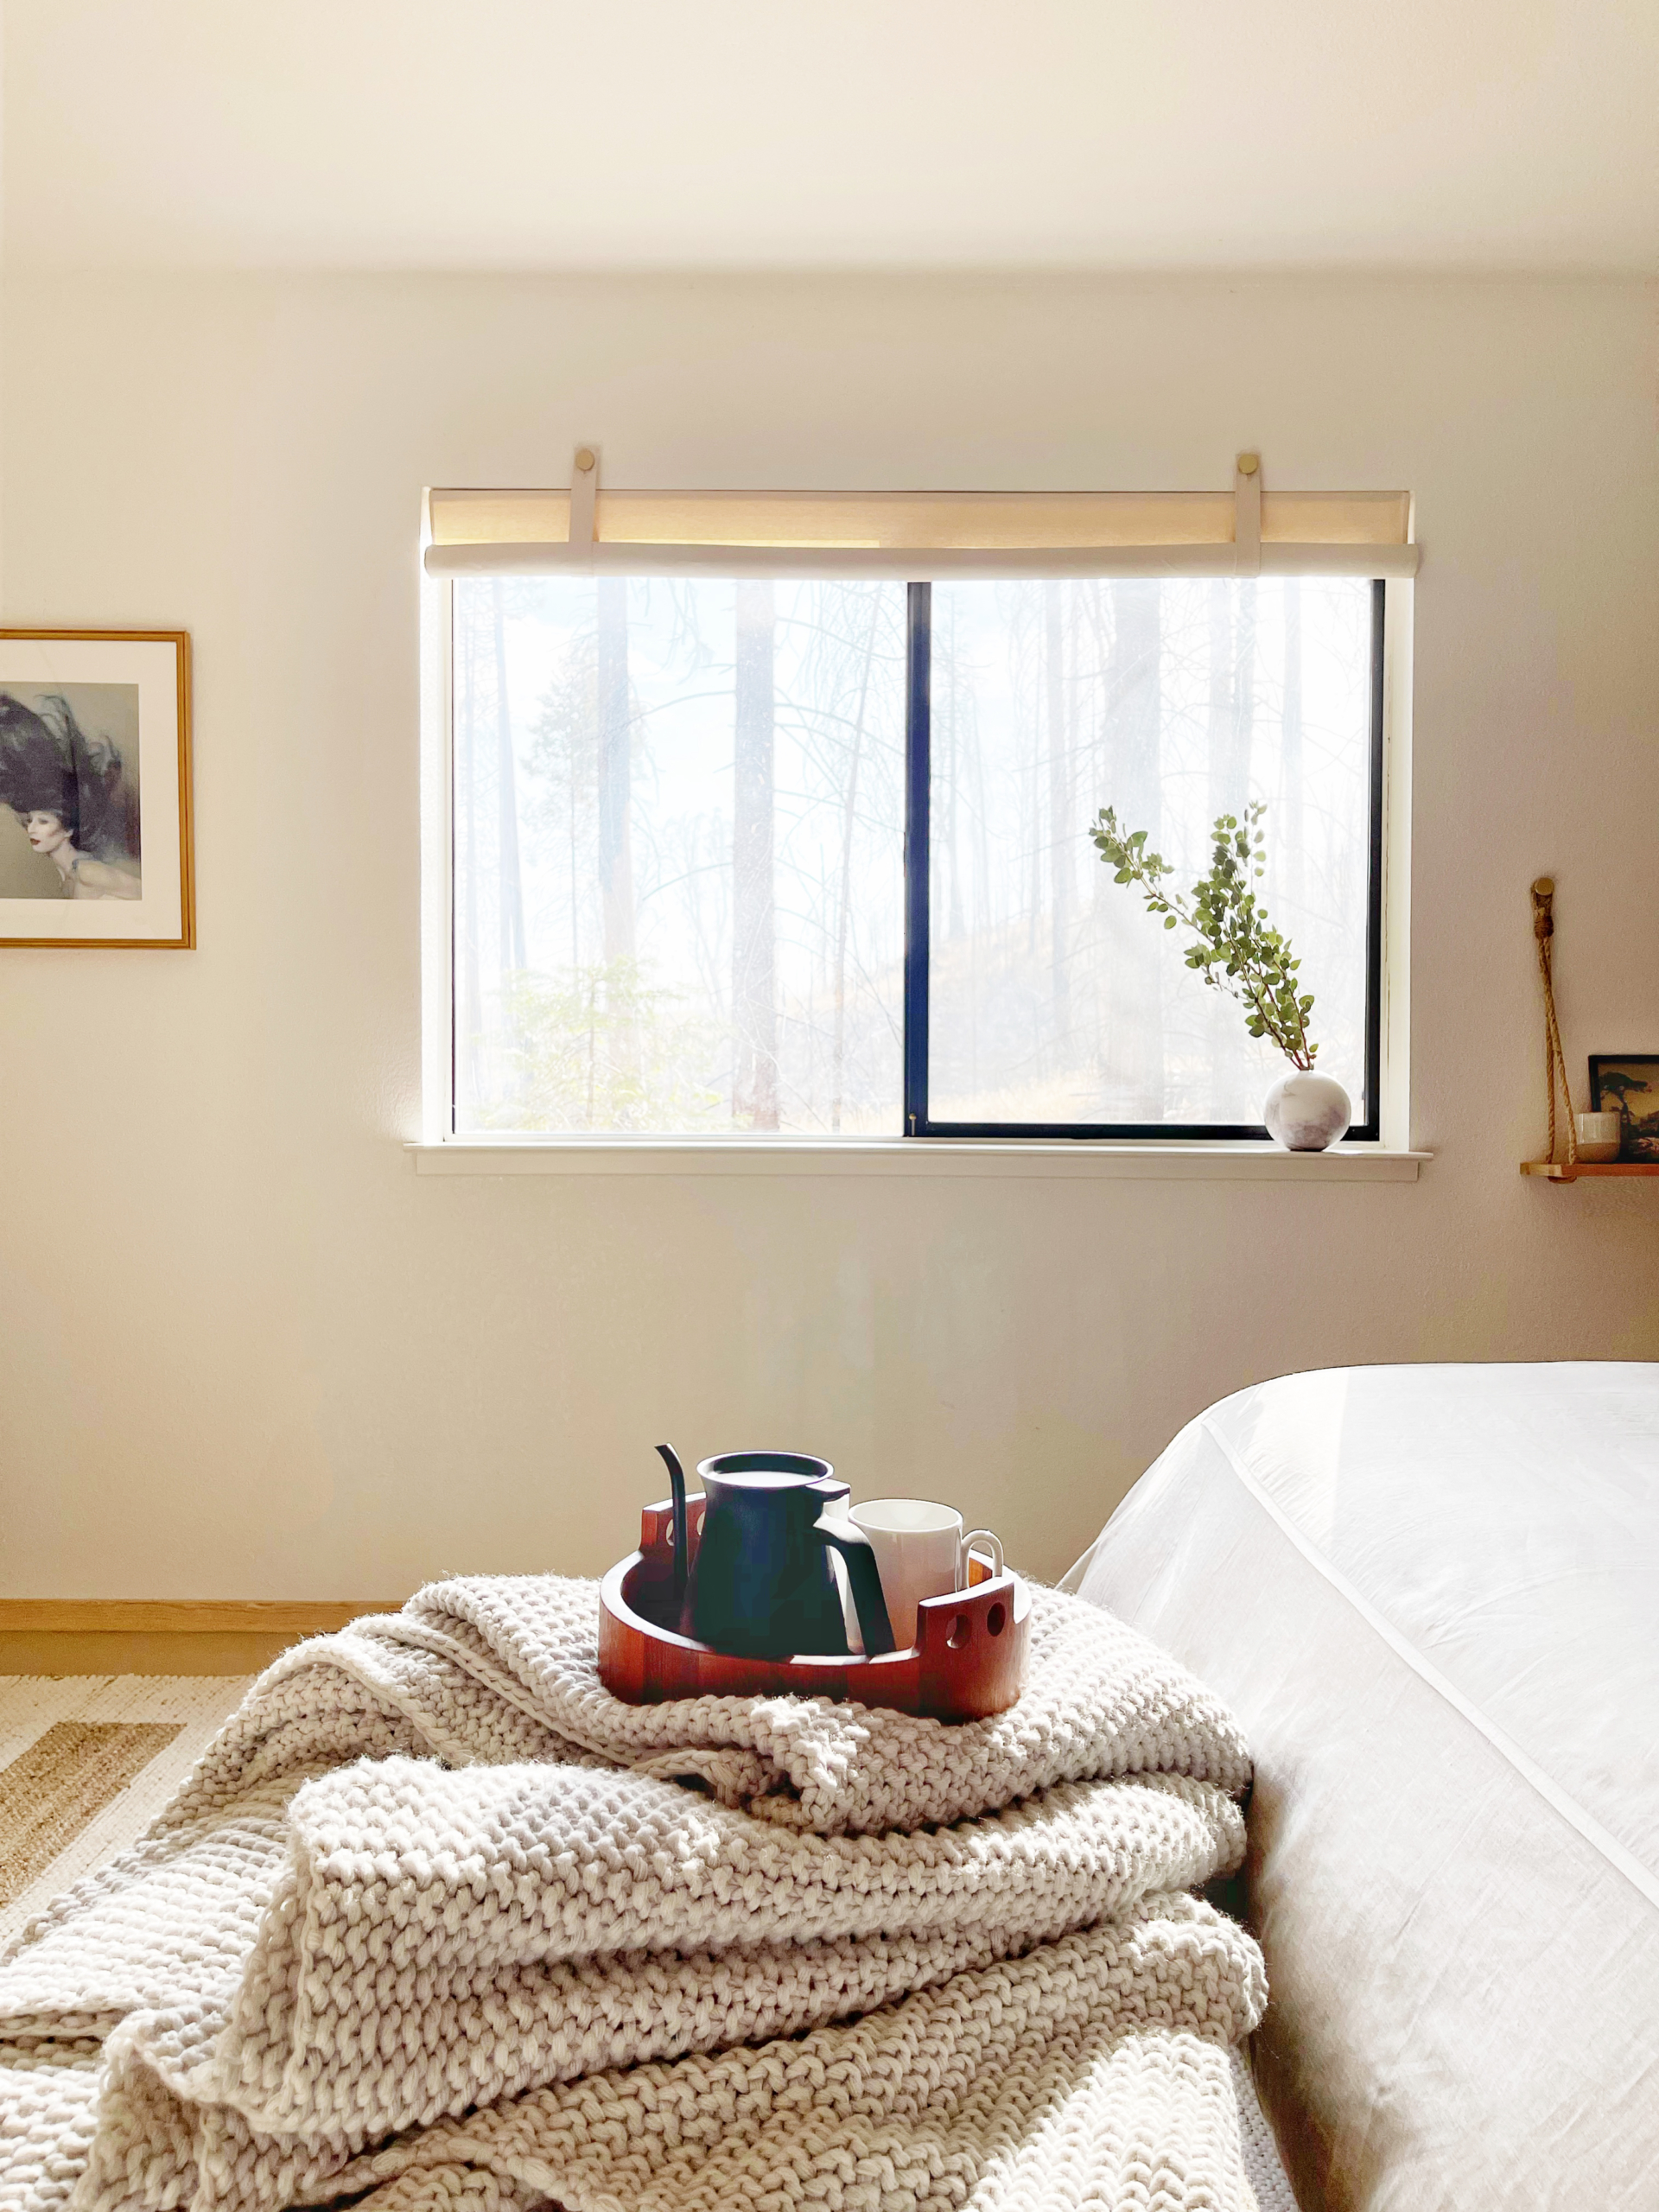
SAVE: THE WINDOW TREATMENTS
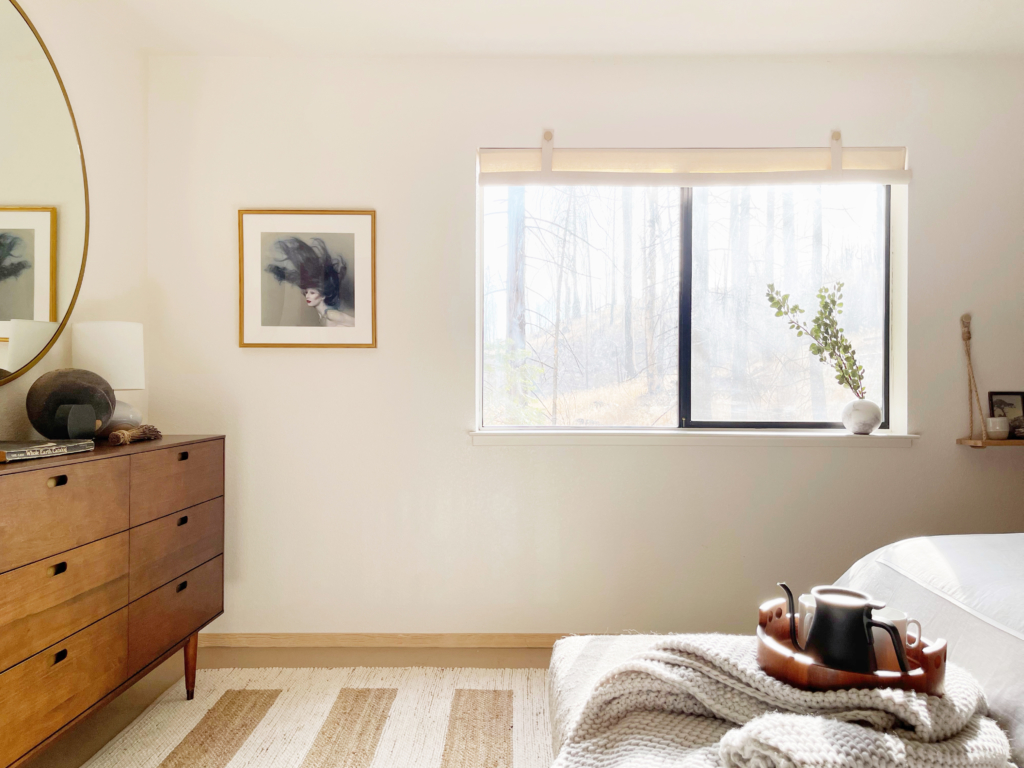
I’ve counted and I’ve moved about fifteen times since I graduated from college. And in many of those moves I moved into a place that had no window treatments (or window treatments so ugly I couldn’t bear to not tear them out). I’m quite familiar with the paper accordion style temporary window treatments you can get to cover your windows while you wait for your custom shades to be made or until you find something ready-made that’s better. The problem with those is that sometimes they’re still there a few years later, so if you’re going to do something temporary I might spend the time like I did and make something yourself (with the help of your orMOMdo, if possible). I spent about $20 per window on making shades out of artist’s canvas, some dowels, a piece of wood, and some cheap hanging hardware. I plan on doing a tutorial about how to make these at some point but the basic gist is you make a panel with a sleeve at the end for the dowel then make hanging straps. If you don’t have access to a sewing machine to finish the sides I think these would look just as cute with a frayed edge. This was just one way I saved money in this room.
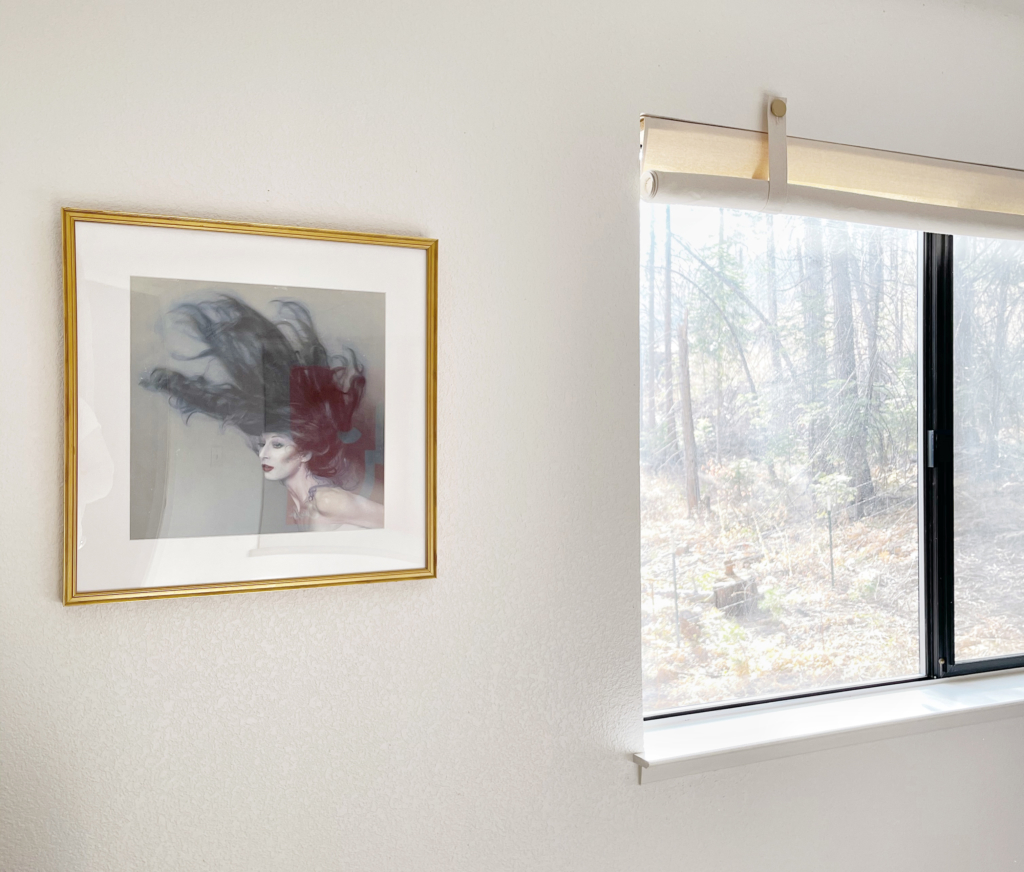
SPURGE: ARTWORK
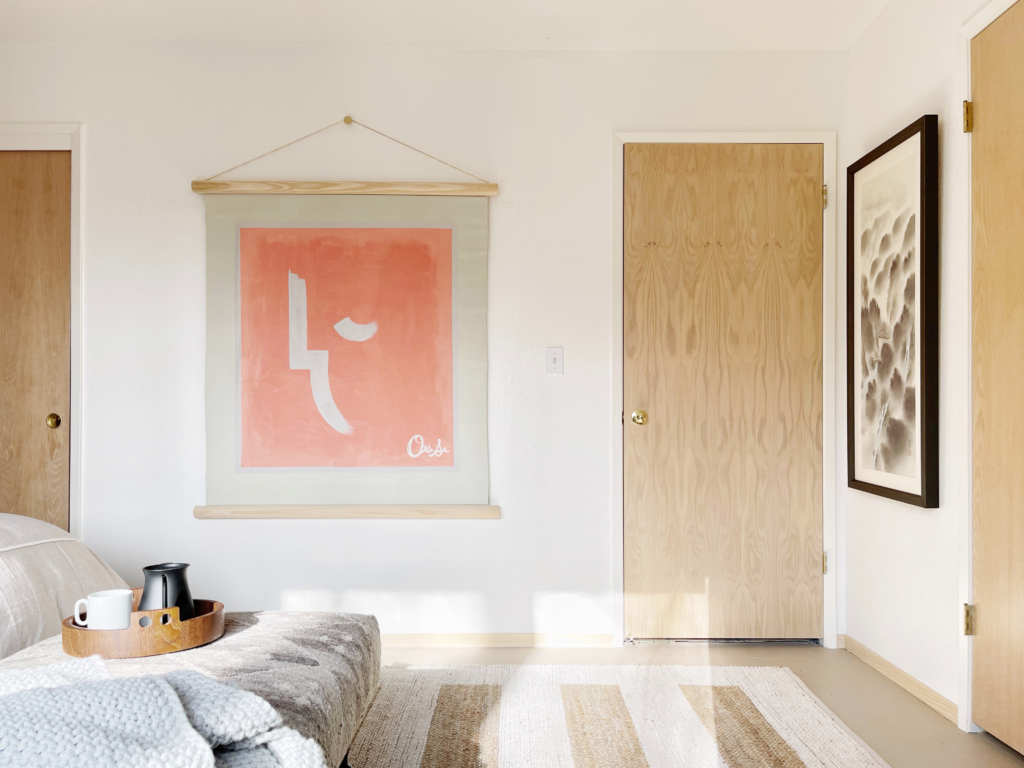
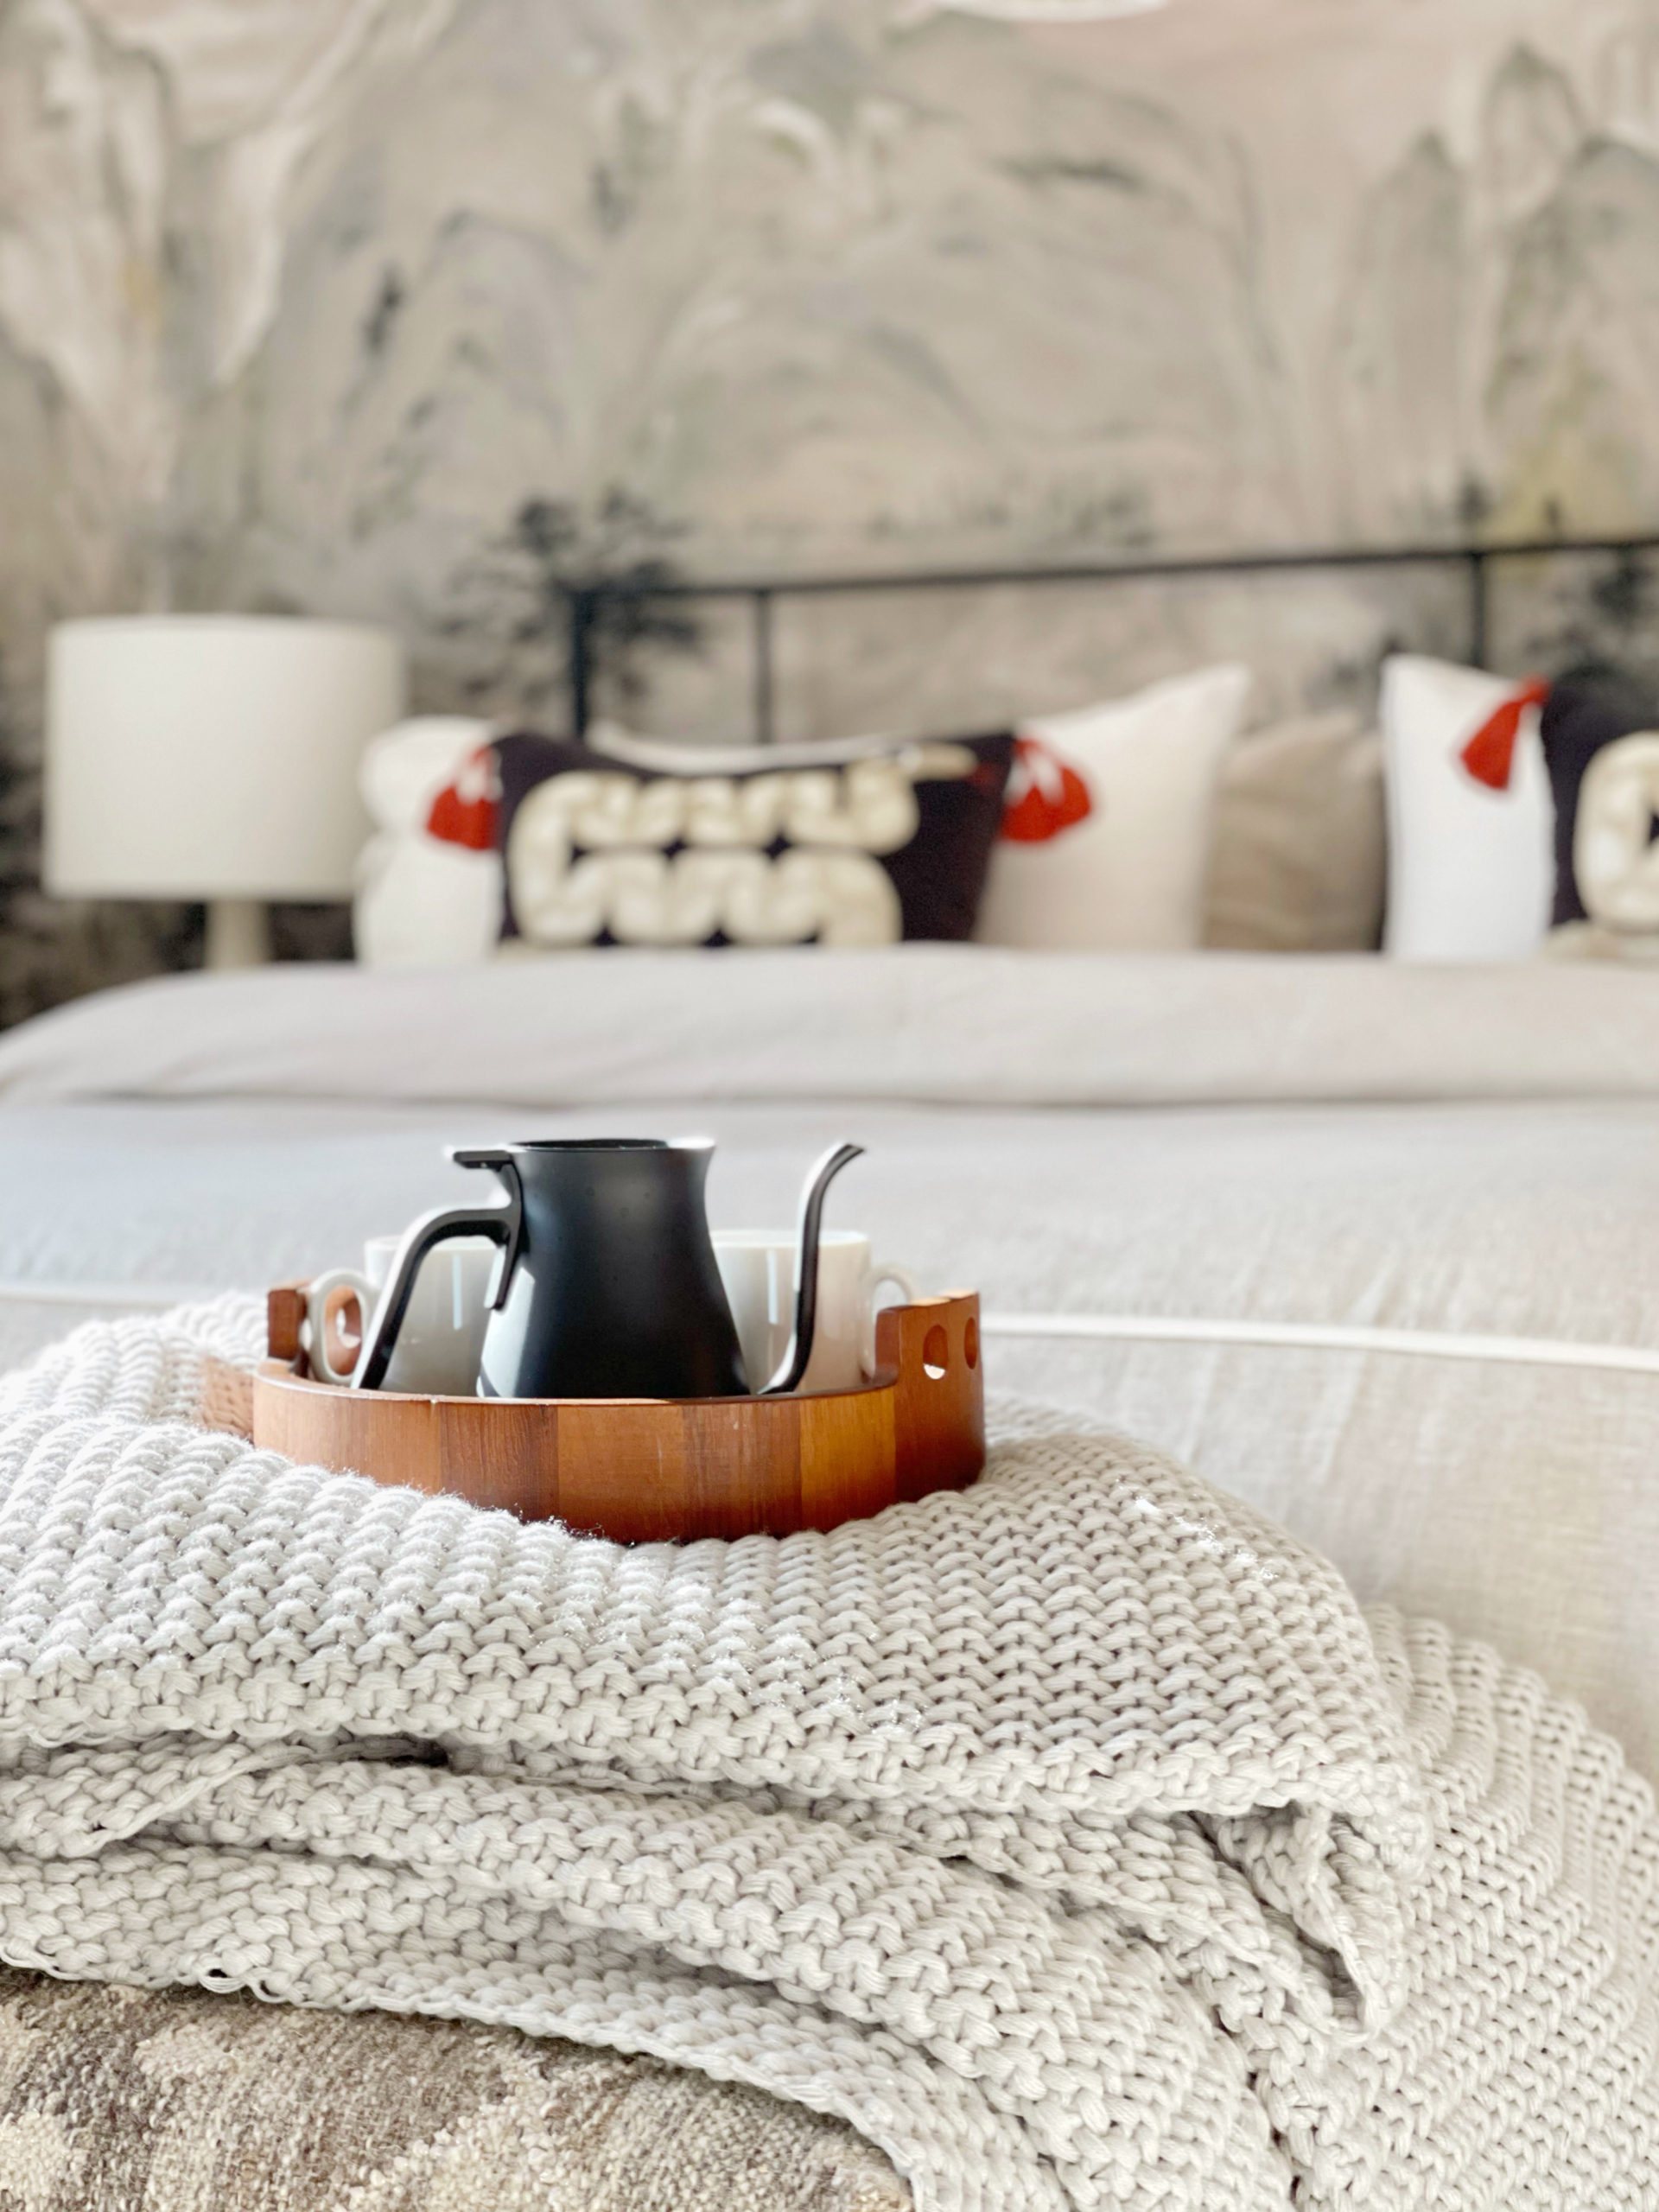
I’ve said this before and I’ll say it a million times until my head violently explodes off my body: you can literally have a room filled with garbage furniture but if you add beautiful artwork it’ll look like a million bucks. Art creates the character of the space so it’s the best place to spend money. The wall hanging here is about $1000 and the beautiful Japanese painting (a $60 thrift store find orMOMdo found in Japan that cost about $600 to frame). You can definitely find inexpensive art if you’re willing to search for it, but I’d say if you’re looking for a smart way to add style to a space, art is always the best place to start.
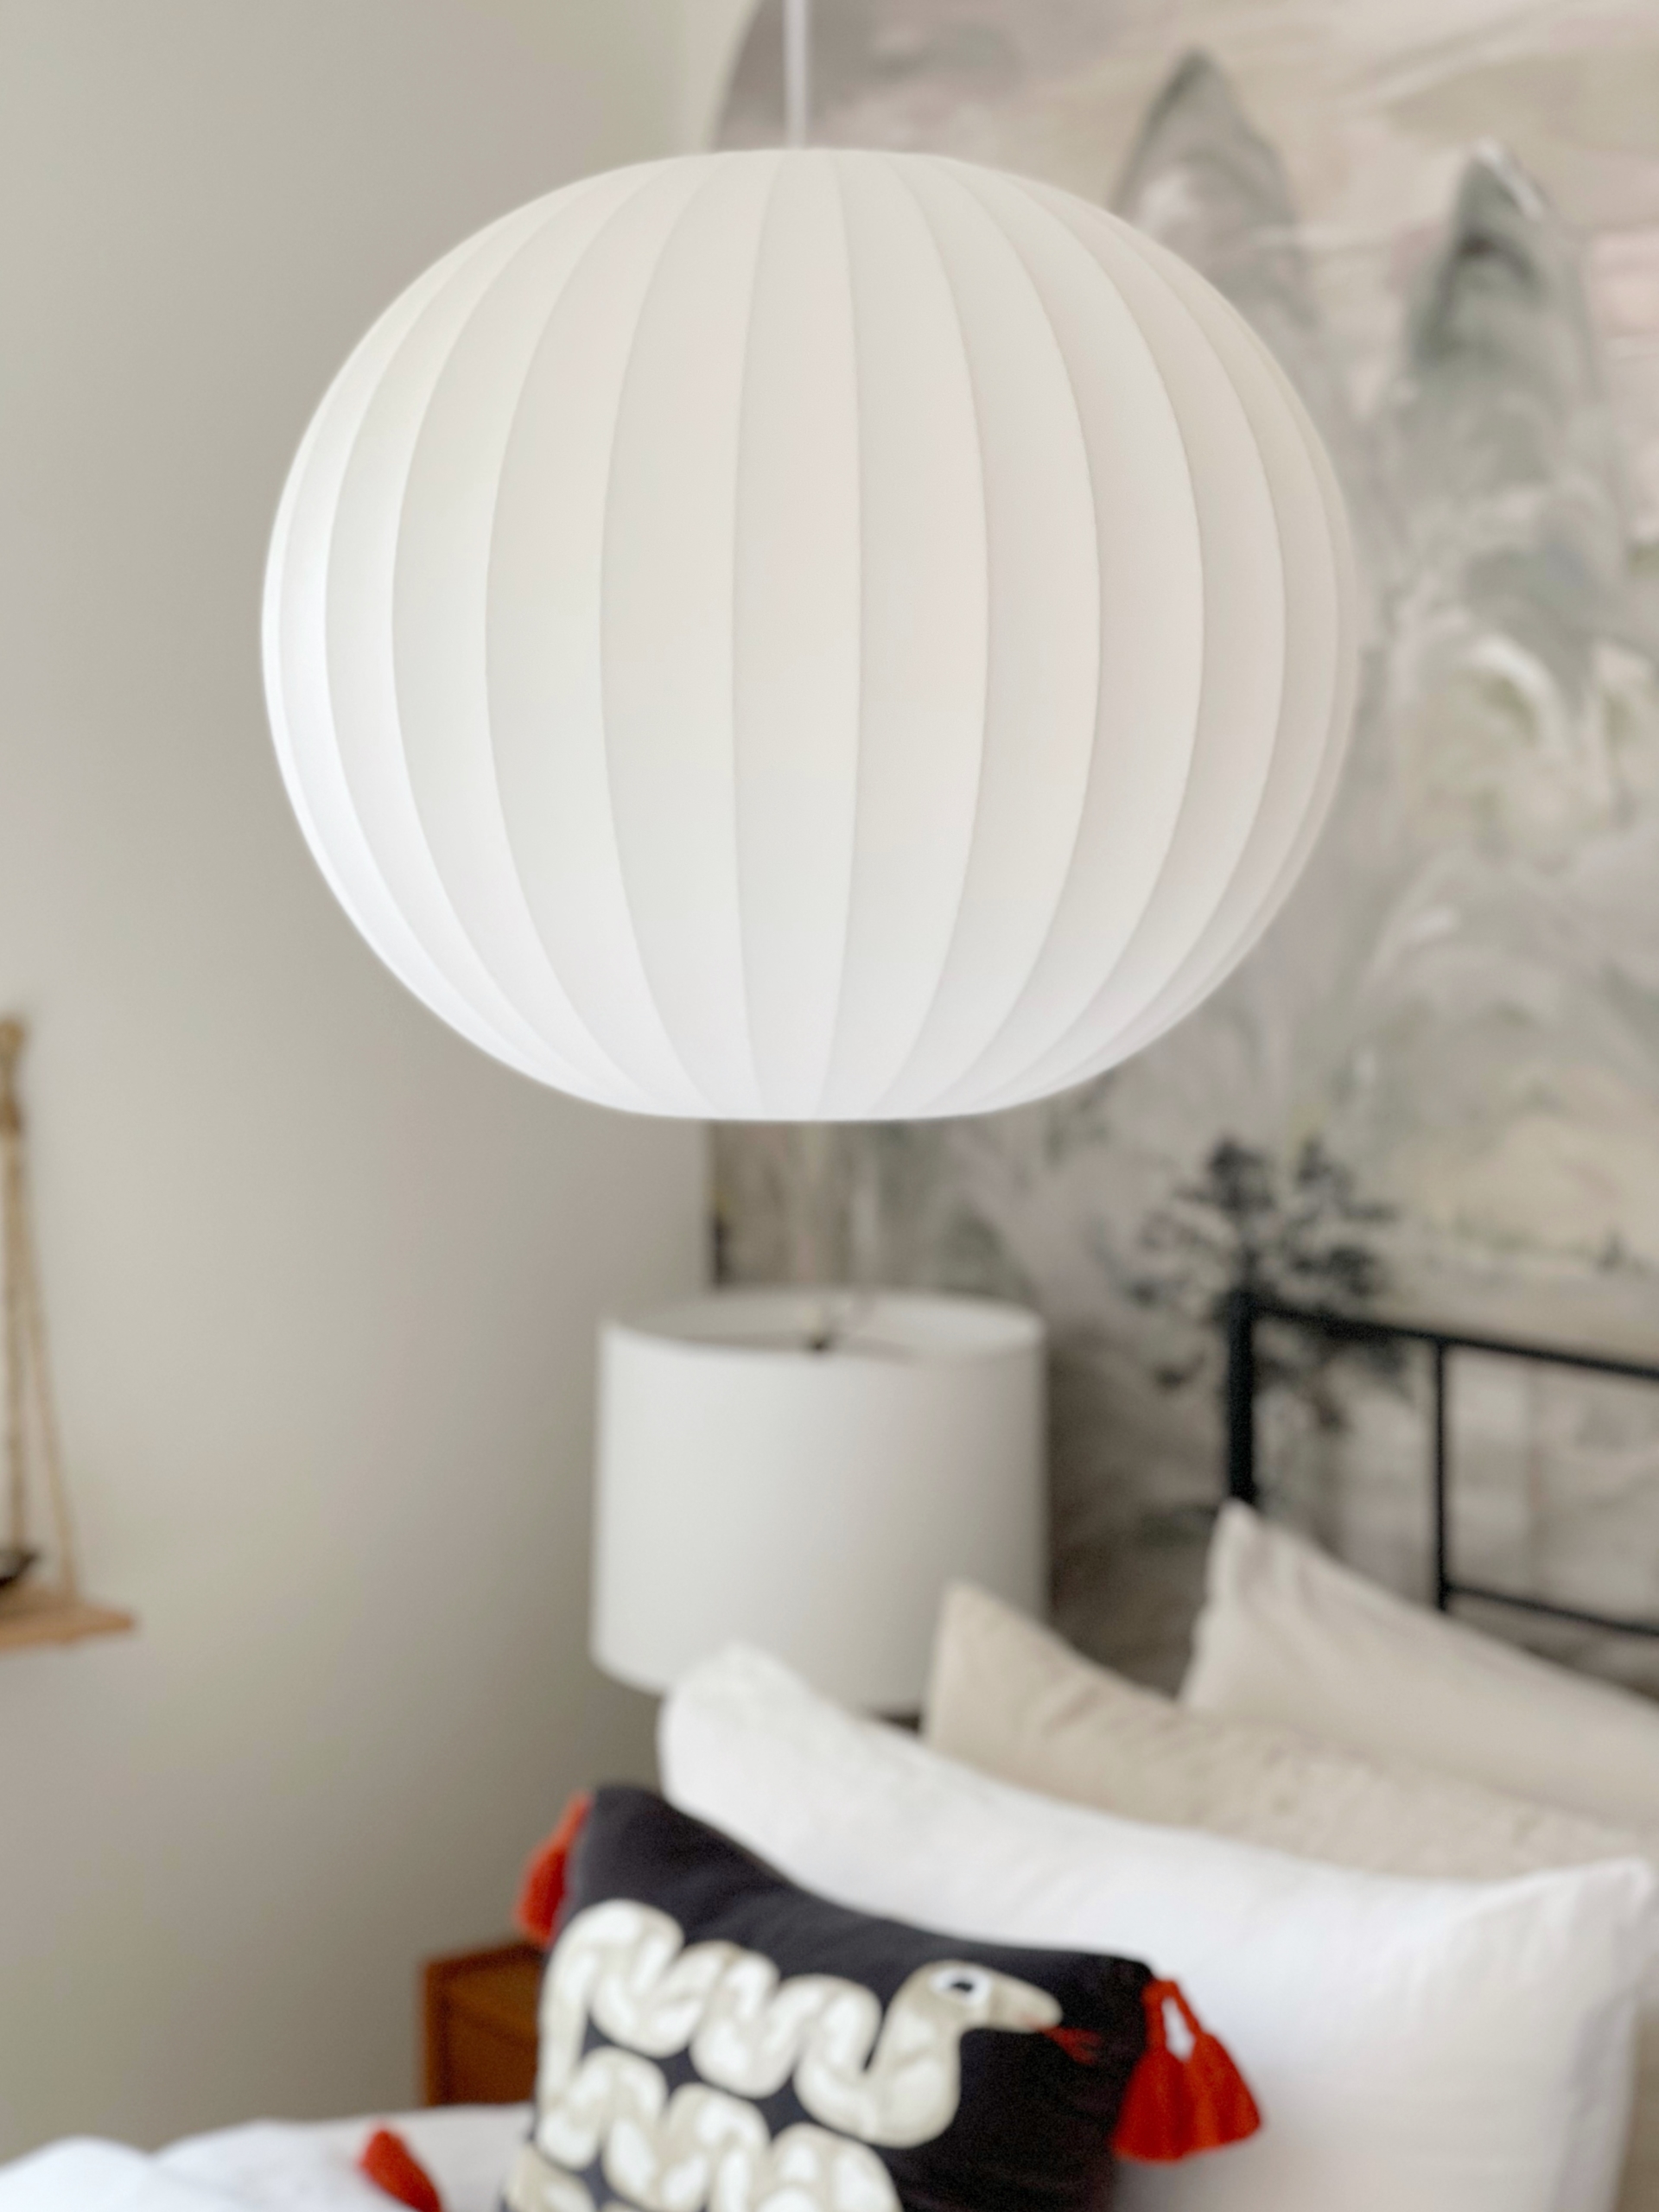
SPLURGE *OR* SAVE: LIGHTING
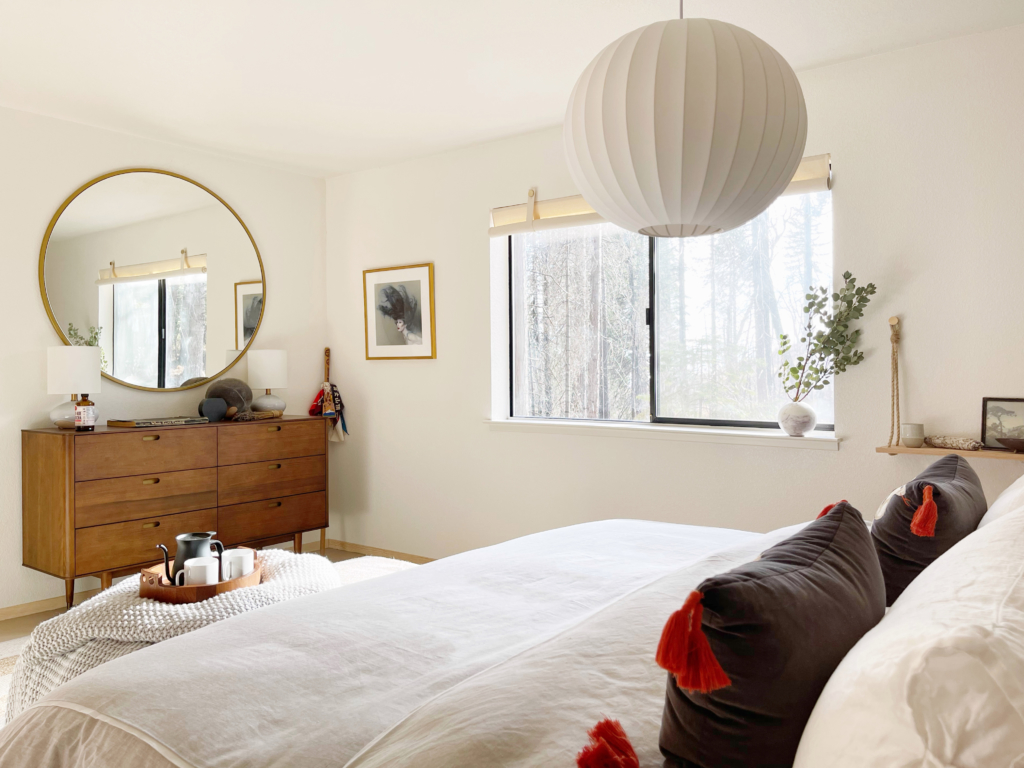
So, for this part of the room I originally started with a “save” (a $30, 36″ large paper lantern I bought from Save-On Crafts, that is tragically no longer in stock, see below). However, even though that giant paper lantern fulfills all my Leanne Ford fantasies and actually looks okay in a photo, in real life it felt a little oppressive when you were laying in the bed so I decided to replace it with a smaller, slightly more tailored version from AllModern. I actually like both versions quite a bit but the AllModern one definitely feels a little more high-end. However, I think what I respond to with these paper lanterns is A) They remind me of one of my favorite artists Isamu Noguchi, even though they are knock-offs and B) They kinda remind me of some of my parents cool artist friends in the nineties, just kind of casual an inexpensive yet chic. If you’re going for this look, though, and don’t want to spend over $400 on a fixture, try the paper lantern first. You can find them super cheap from a ton of different sources, mostly party supply shops. Or you can seek out the officially sanctioned, and absolutely gorgeous Isamu Noguchi versions which are thousands of dollars but hand-crafted from completely different materials than the machine made ones and worth every penny. I’m really happy with the AllModern pendant I replaced the paper lantern with – it gives a nod to the mid-century accents in the room and the Japanese accents throughout.
Sidenote: Can you spot the bottle of kombucha I accidentally styled into the above photo? I’m still getting used to taking all my own photos in addition to doing all the labor, installation, and styling work. Covidtimez…
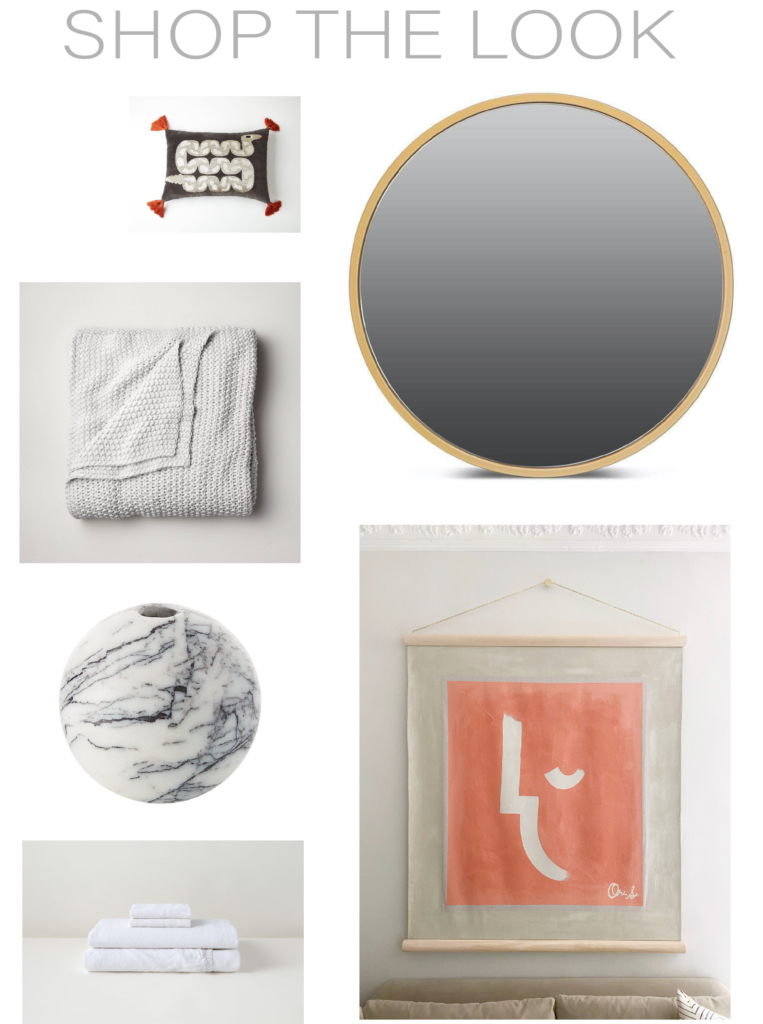
Sources: Snake Pillow by Justina Blakeney, 48″ Round Mirror from Scandinavian Designs, Casa Luna Knit Blanket, Wall Hanging by Orlando Soria, Round Marble Vase from CB2, White Linen Sheets (Similar to Shown) from Tuft & Needle.
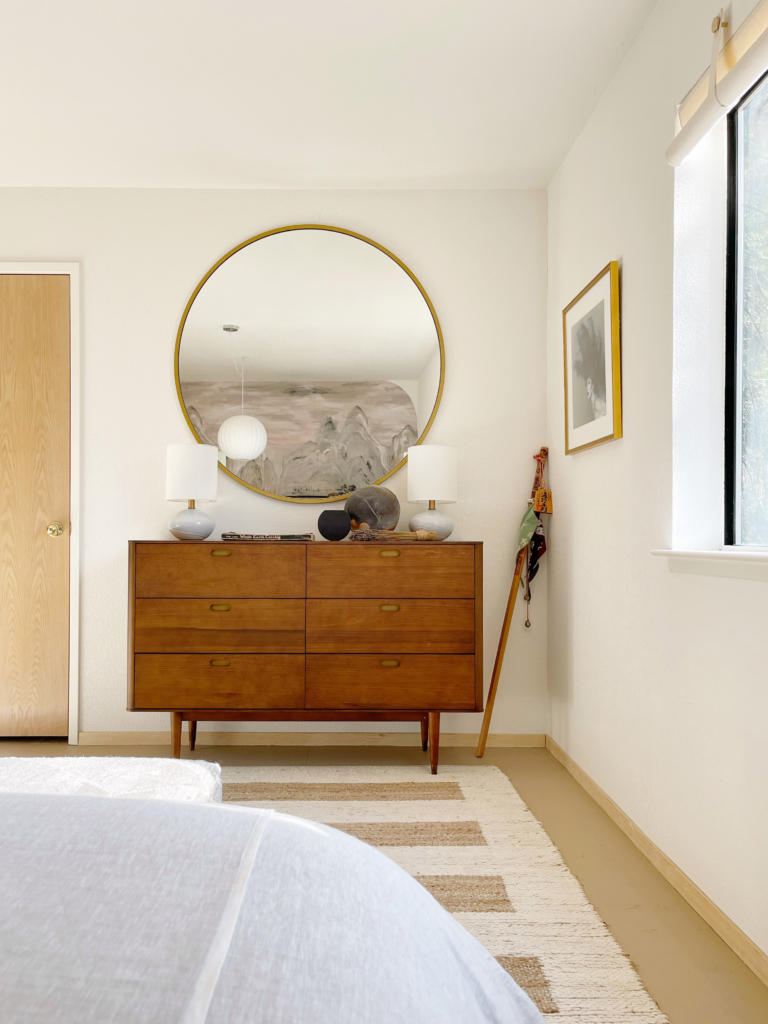
SAVE OR SPLURGE?: DRESSER AND NIGHTSTANDS?
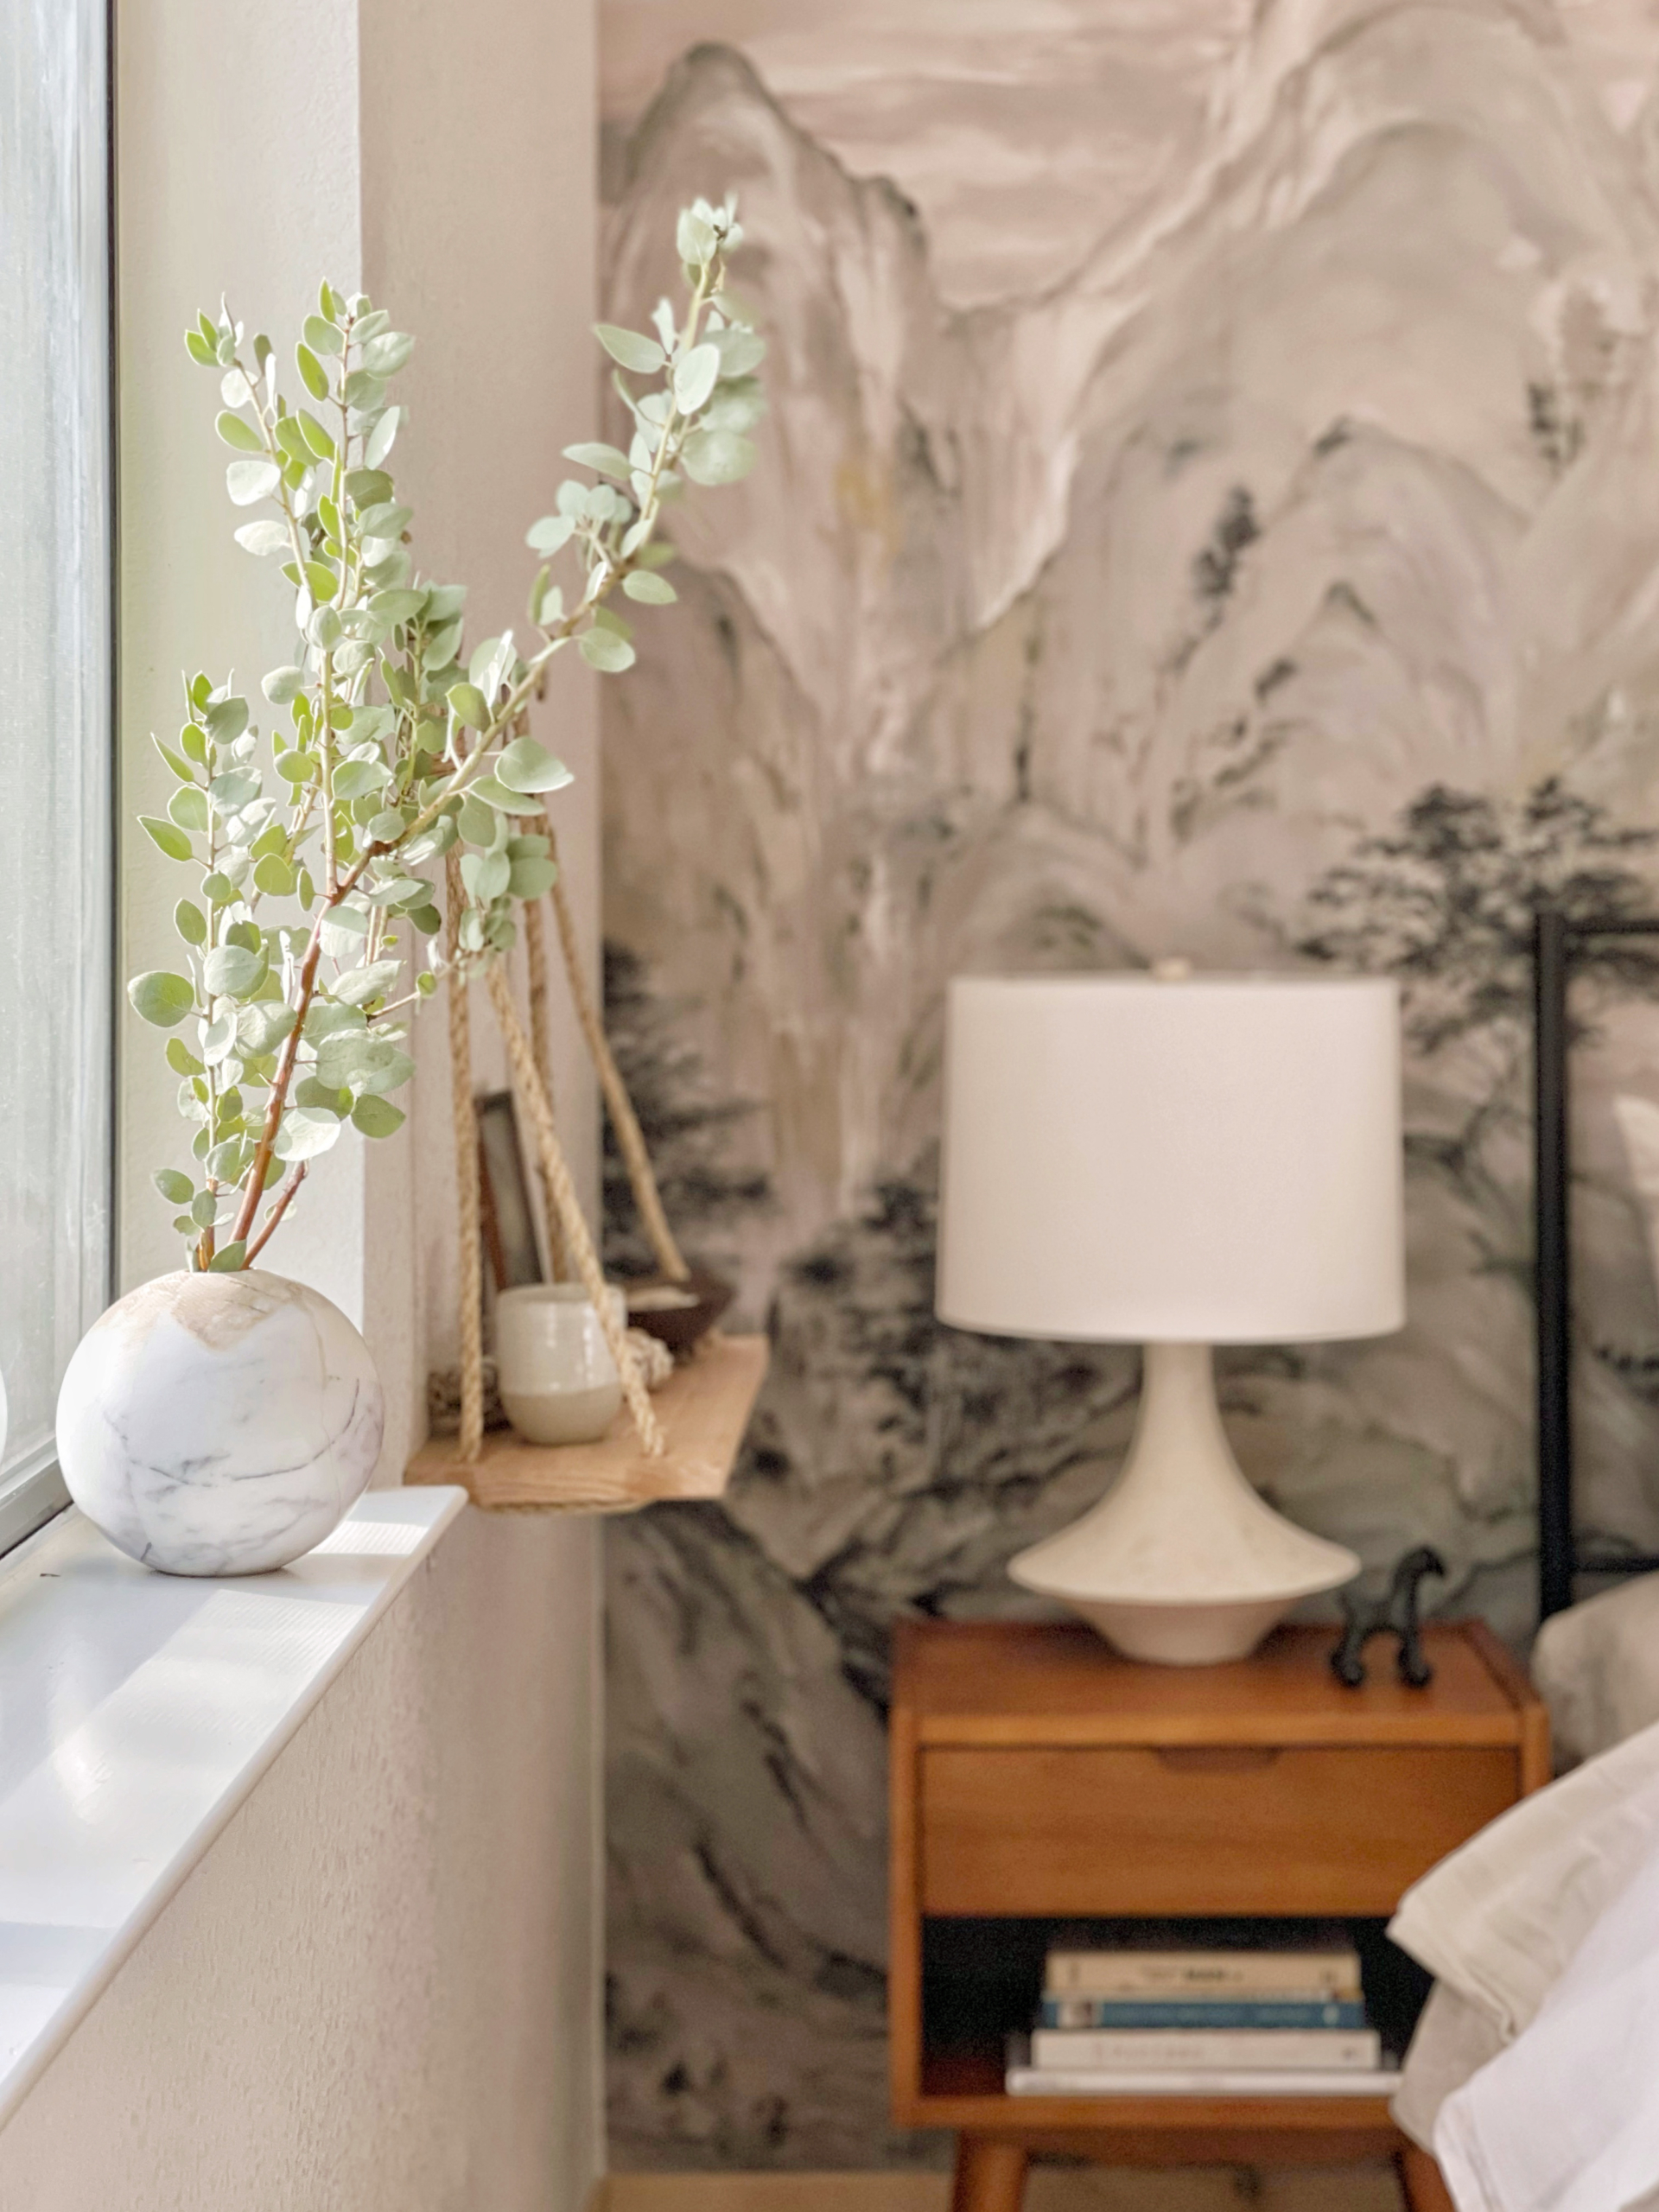
I actually can’t really tell if the dresser and nightstands, both from Scandinavian Designs, were a splurge or a save. The dresser was about $800, which for a solid wood dresser of this quality, white glove delivered into place, seems like a pretty good price. The nightstands were about $270 each, which is obviously more expensive than Ikea but less expensive than what you’d find at west elm or CB2. I think I’m landing on “save” for these considering the quality of the construction, they look like mid-century pieces I’d pay a lot more for if I bought them vintage at a shop or maybe even at Rose Bowl (remember flea markets? LOL). What do you think?
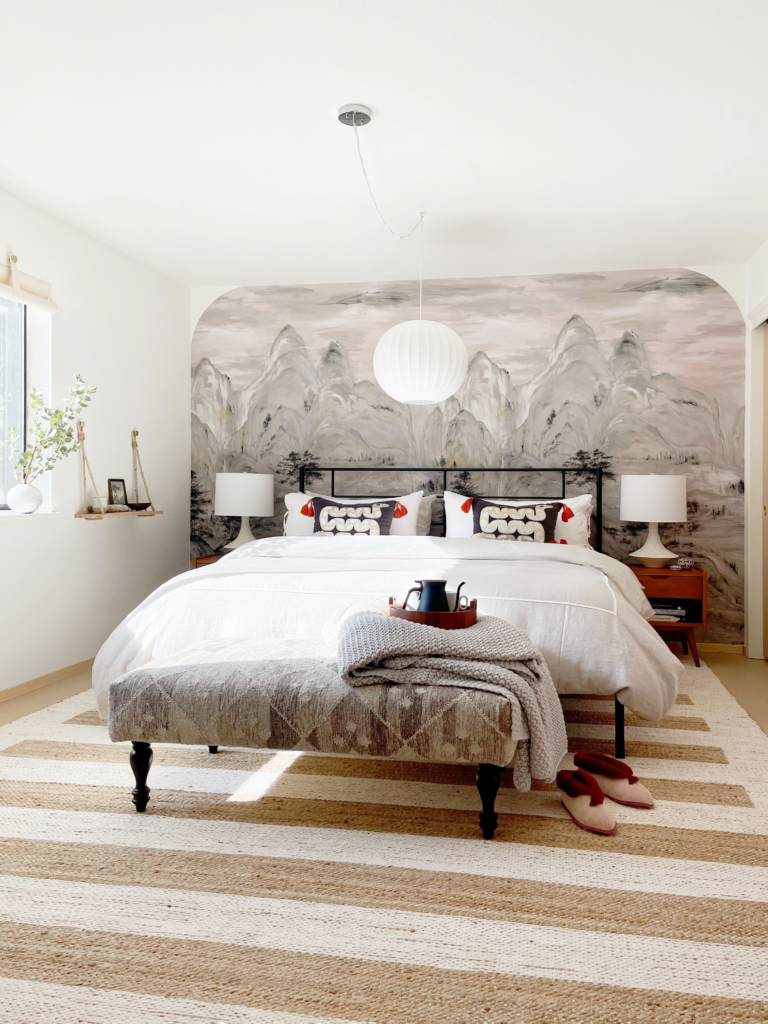
SAVE: THE BED
For some reason it’s not that hard to find really handsome metal beds that aren’t expensive. I think it’s because metal is strong enough that they can be made of a ton of different tiny pieces that can be shipped in small packages and assembled by the buyer (this one took about an hour to put together). I’ve found AMAZING metal beds at Ikea and Living Spaces before that were so cheap. And this bed was LESS THAN $150! Try finding a king size bed at that price point that is upholstered or wood. If you do, the quality will probably be highly questionable. But I love that this bed, while being a total save, adds another color and material to the room and looks really chic.
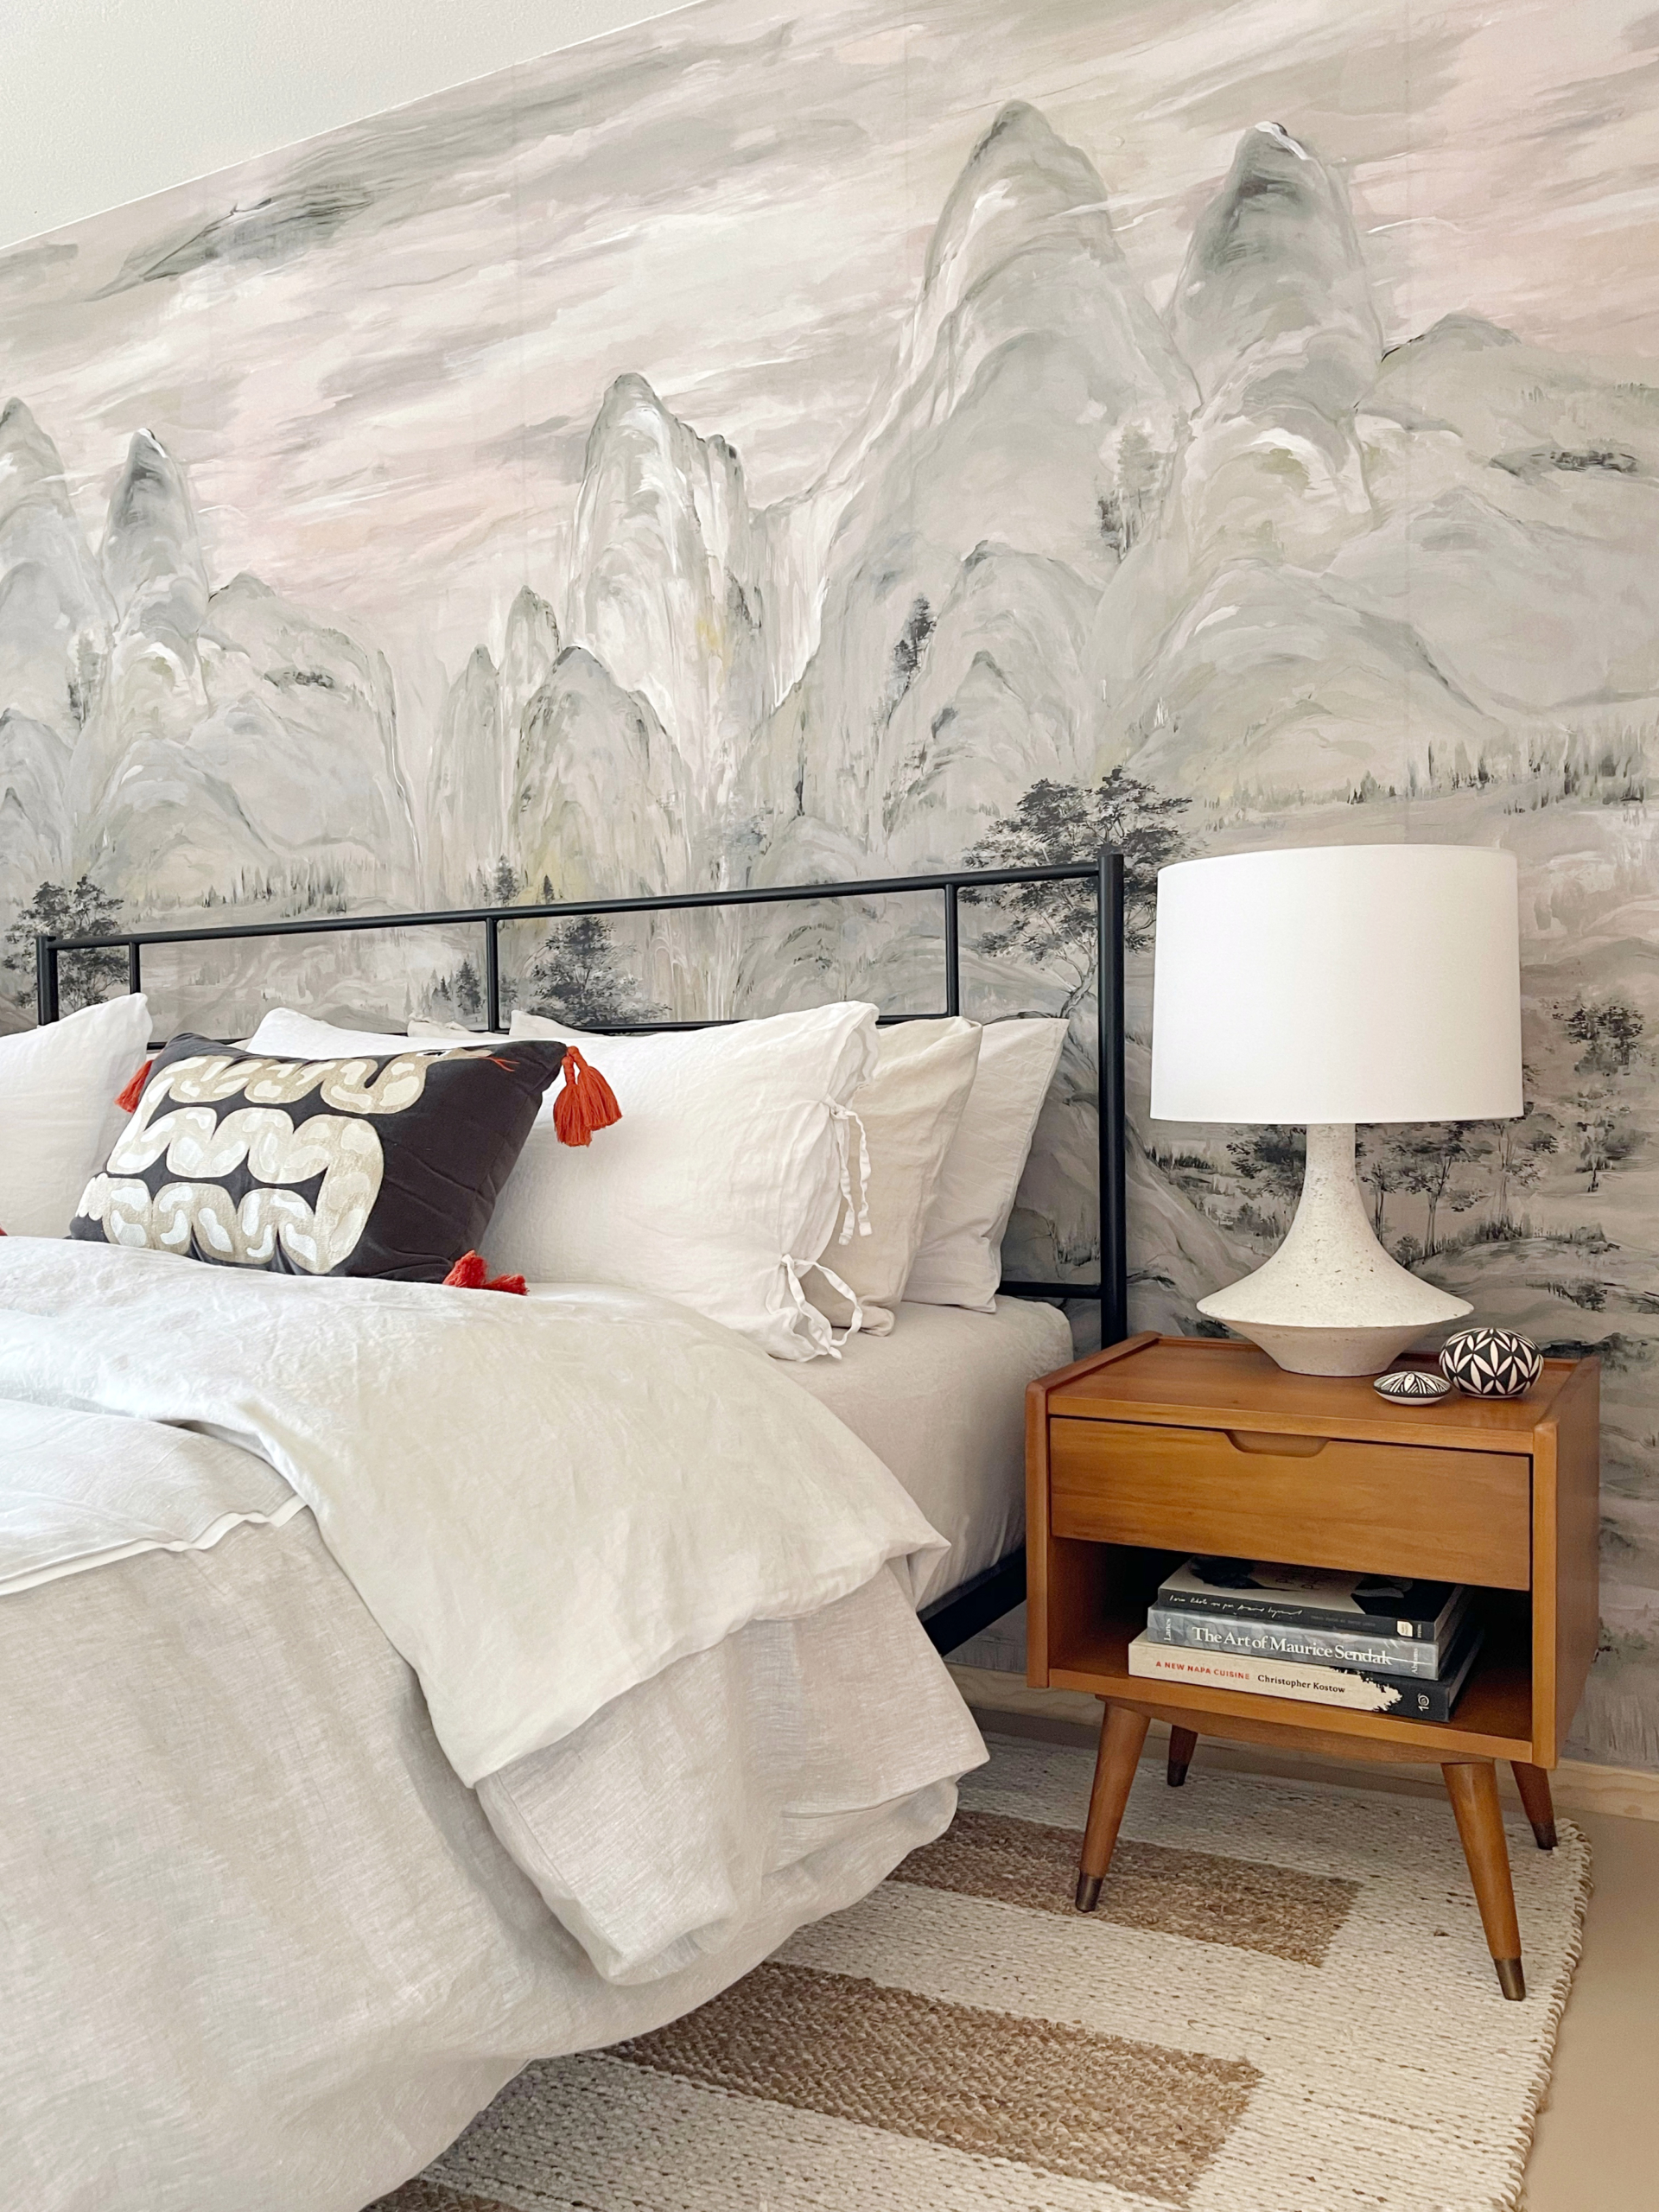
It goes without saying that the biggest impact in this entire space is the stunning wall mural I got from York Wallcoverings. I got this sponsored by the company as part of a collaboration, but the full wall mural costs somewhere around $350 and I used two of them to cover the whole wall. Add to that the tools and materials needed to install it and you’re probably getting close to $1000. And that’s if you don’t pay a wallpaper installer to do it for you. I did it myself and didn’t find it too challenging, but if this were the final look of the room I probably would have paid someone to do it more “perfectly” which would have added at least $1000 to the cost of installation. But it completely defines the room and makes it feel really special. It created the color palette and the vibe of the space the second I put it up.
So, there you have it! Where I splurged and where I saved in my temporary glow up for my parents’ guest bedroom. Head over to Emily’s blog to read more about my design process and read my rant about how straight men are stupid and don’t wear masks. And see below for links to everything in the room. Okay bye!
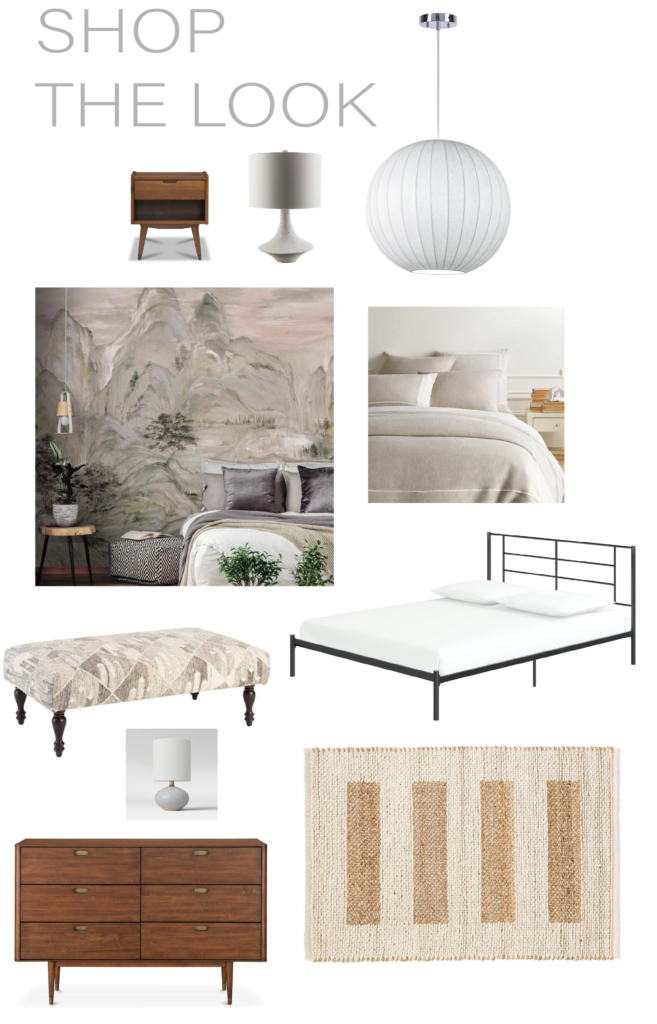
Sources: Nightstands from Scandinavian Designs, Concrete Look Table Lamps from AllModern, Globe Pendant Light from AllModern, Wall Mural from York Wallpaper, Linen Duvet Cover from Annie Selke, Black Metal Frame Bed, Bench from Annie Selke, Dresser from Scandinavian Designs, Rug from Annie Selke.
One thought on “Mixing High & Low in a Londo Lodge Guest Bedroom”
Comments are closed.